

Scar Tattoo Camouflage A Guide to Flawless Skin
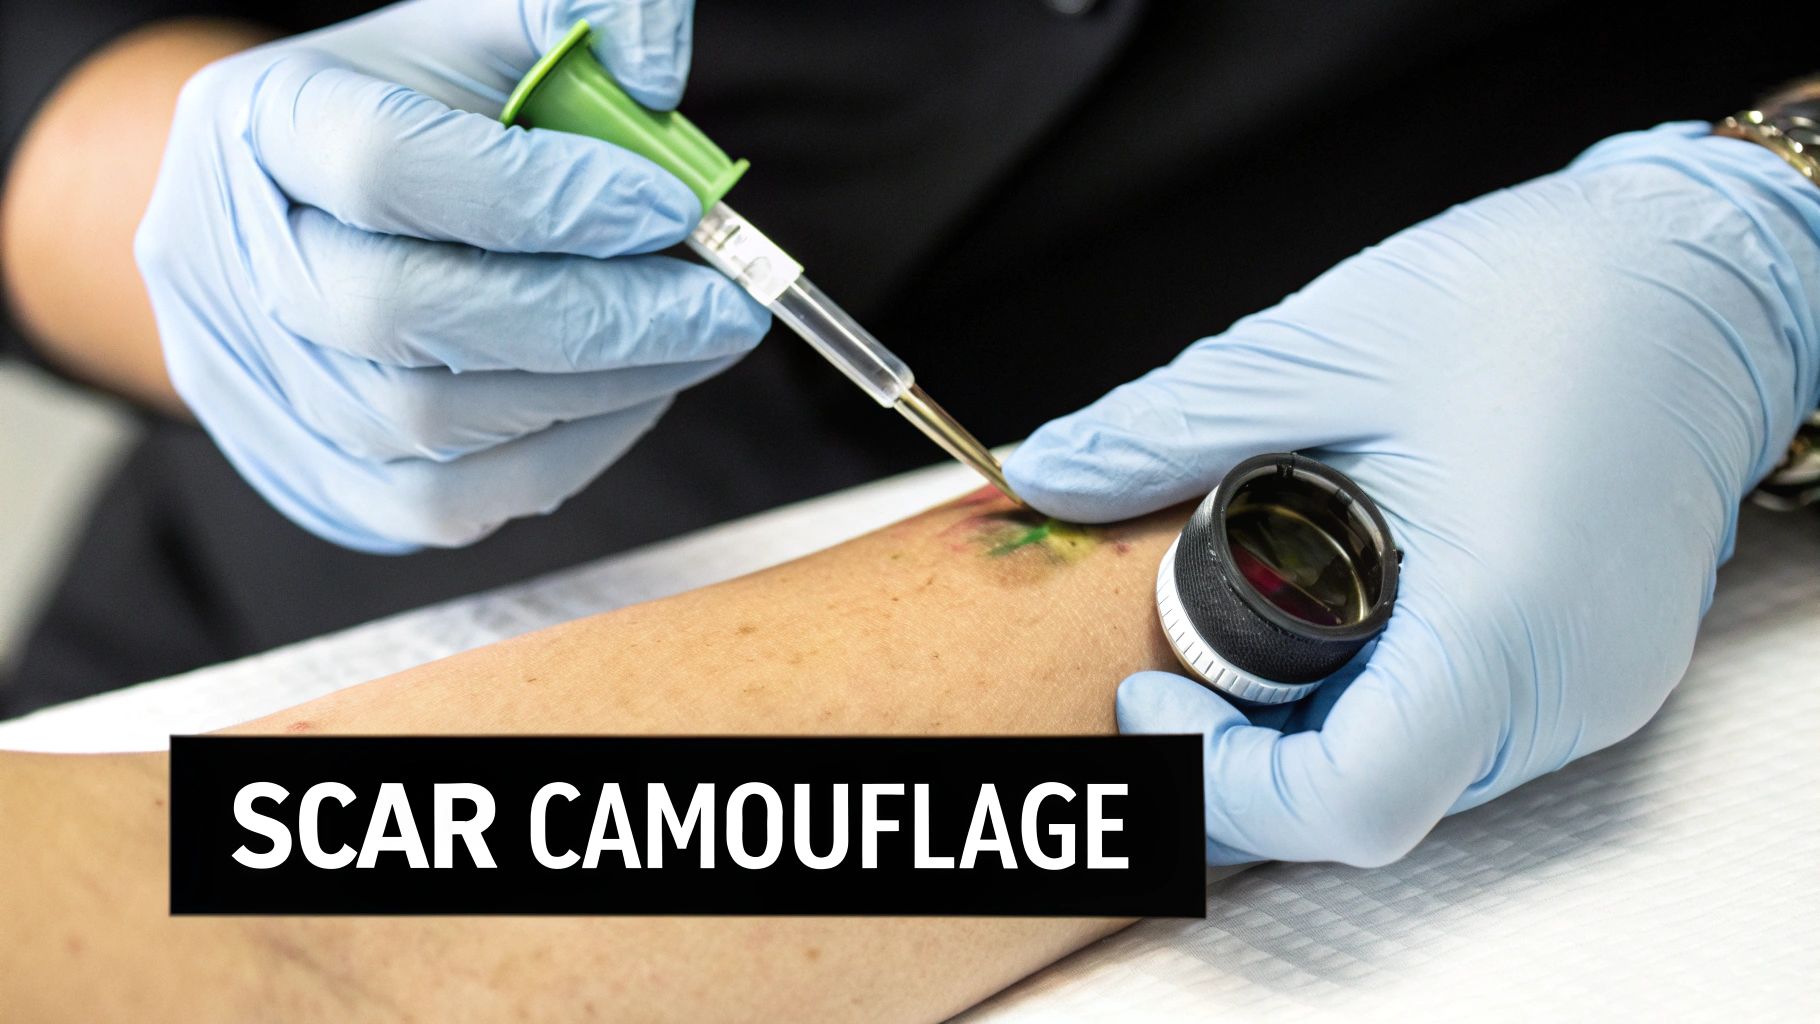
Imagine an artist standing before a canvas, meticulously mixing paints to match the exact shade of the surrounding area, making a small imperfection simply disappear. That’s the very essence of scar tattoo camouflage. It's a highly skilled cosmetic technique designed to dramatically reduce a scar's visibility, blending it seamlessly into your natural skin tone.
Uncovering the Art of Scar Concealment
Often called paramedical tattooing, this is a world away from the traditional tattoos you might see in a high-street studio. The goal isn't to cover a scar with a bold, eye-catching design. Instead, it's about creating a clever optical illusion—making the skin look smooth and evenly toned right where the scar used to stand out.
So, how does it work? A trained practitioner custom-blends a unique cocktail of flesh-toned pigments, precisely matching them to your skin's specific colour, right down to the subtle undertones. Using a specialised digital tattooing device, they carefully deposit this pigment into the dermal layer of the scar tissue itself.
The ultimate aim isn't to erase the scar, because scar tissue is permanent. It's to integrate it so well with the surrounding skin that it becomes practically invisible to the naked eye.
This process is a true marriage of science and art. It demands immense skill, a deep understanding of how skin heals and holds pigment, and a finely-tuned artistic eye for colour. The whole approach is gentle, precise, and focuses on subtlety.
A Specialised Solution for Scalp Scars
When you’re dealing with scars on the head—often left behind by hair transplant procedures like FUT or FUE—a different approach is needed. This is where Scalp Micropigmentation (SMP) comes into its own.
Instead of trying to match the skin tone, an SMP artist uses pigment to replicate the look of thousands of individual hair follicles. By carefully placing these tiny pigment dots in and around the scar, the artist achieves two fantastic results at once:
- The scar itself is effectively camouflaged, disappearing into the "hairline."
- The treatment adds the appearance of greater hair density, giving a fuller look to the whole area.
At My Transformation, SMP for scar concealment is one of our core services for clients across Western Australia. It’s a powerful way to regain confidence and hairstyle freedom, whether you keep your head shaved or have thinning hair.
Scar Camouflage vs Traditional Tattoos
It's really important to distinguish between paramedical camouflage and a standard decorative tattoo. While both use needles and pigment, their purpose, tools, and techniques couldn't be more different. Think of it as corrective cosmetic work versus body art.
This quick table breaks down the key differences.
| Feature | Scar Tattoo Camouflage | Traditional Tattoo |
|---|---|---|
| Primary Goal | To conceal and blend imperfections with natural skin tones for a discreet result. | To create a visible piece of art using bold lines, shading, and vibrant colours. |
| Pigments Used | Custom-blended flesh tones designed to match skin and fade naturally over time. | Pre-made, bold-coloured inks (blacks, blues, reds) designed for high contrast and longevity. |
| Technique | Precise, gentle application focusing on pointillism and soft shading to mimic skin. | Often involves outlining, solid colour packing, and heavy shading for artistic effect. |
| Artist Training | Requires specialised certification in paramedical tattooing, skin anatomy, and colour theory. | Requires apprenticeship and training in artistic styles and traditional tattoo application. |
Ultimately, opting for scar camouflage is a decision to restore your skin's natural appearance, not to decorate it. For countless people here in Western Australia, it’s a way to finally move past the daily reminder of an old injury or surgery and feel whole again.
Are You a Good Candidate for Scar Camouflage?
Scar tattoo camouflage can work wonders, but it’s not a one-size-fits-all solution. The first and most crucial step is figuring out if your specific scar is right for this kind of treatment. Getting this right from the start sets you up for realistic expectations and a much better final result.
Think of it like painting a wall. You wouldn't just slap a coat of paint over a damp patch or flaking plaster and hope for a perfect finish, would you? It’s the same with skin. The scar tissue has to be in the right condition for the pigment to take properly and look natural. We need a stable, receptive canvas to work with.
The Makings of an Ideal Scar
Your journey starts with a quick self-assessment. Of course, a professional consultation is a must, but knowing what we look for can give you a good idea of whether this is the right path for you. Generally, the best outcomes happen when scars have certain characteristics.
We look for three key things:
-
Age: Patience is everything here. A scar needs to be completely healed and settled before we can even think about touching it. That means waiting at least 12 to 18 months after the surgery or injury. This gives the scar tissue time to soften, stabilise, and stop changing, which is essential for the pigment to hold correctly.
-
Colour: We get the best results on scars that are lighter than the surrounding skin—think white, silvery, or pale marks. A lighter canvas makes it far easier to custom-blend pigments and create a seamless transition. Scars that are still dark, red, or purple are usually a sign of ongoing healing or have too much of their own pigment, making them tricky to colour-match.
-
Texture: Flatter is better. Scar camouflage is brilliant at correcting colour, but it can't change the physical texture of your skin. While a skilled artist can create an illusion of smoothness, the technique is most effective on scars that are reasonably level with the skin around them.
Here in Australia, scar camouflage has become a popular choice, especially for things like C-section scars or marks from joint replacements. These types of surgical scars often fit that 12-18 month healing window perfectly. Once they're ready, we can often blend the discolouration beautifully in just one or two sessions. To see how widespread this is, check out this overview of cosmetic tattooing for scars across Australia.
When Scar Camouflage Isn't the Right Fit
It’s just as important to know what doesn't work. Trying to camouflage an unsuitable scar can backfire, leading to a poor result or even making it look worse. Any reputable practitioner in Western Australia will turn down a job if the scar isn't right for the procedure.
These are the main types of scars we have to avoid:
-
Keloid Scars: These are raised, dense scars that grow well beyond the original wound. They’re caused by the body going into overdrive with collagen production. Tattooing a keloid is risky because it can trigger even more collagen growth, potentially making the scar bigger.
-
Hypertrophic Scars: These are also raised and often red, but they don't spread beyond the injury site like keloids do. Still, they represent an overactive healing response, and tattooing them can cause further irritation.
-
New or Unstable Scars: If your scar is still pink, red, itchy, or changing in size or shape, it’s not ready. These are all signs that the tissue is still actively healing, and we need to let it finish its job first.
-
Very Dark Scars: Scars that are much darker than your natural skin tone (hyperpigmented) can't be lightened with camouflage pigments.
Remember, the goal of scar camouflage is to blend and conceal discolouration. It doesn't physically change the scar's structure. If your main concern is a raised or indented texture, you might be better off looking into treatments like microneedling or laser therapy first.
If you’re dealing with a scar from a hair transplant, the same principles apply, but with a few unique considerations for the scalp. For a deeper dive, have a look at our detailed guide on addressing hair implant scars.
Your Scar Camouflage Journey Step by Step
Deciding to go ahead with scar camouflage is a big step, but knowing exactly what to expect can make the whole process feel much more comfortable. It’s not a quick fix; think of it as a carefully planned partnership between you and your practitioner, designed to get a result so natural that only you know it’s there.
The journey starts well before any pigment touches your skin. It begins with a detailed chat and a close look at your scar to make sure this is the right path for you. From there, we move through the treatment itself and into the crucial healing and follow-up stages, all with precision and patience.
The Initial Consultation and Colour Matching
Everything kicks off with the consultation. Honestly, this is probably the most important part of the entire process. Here, your specialist will take a good look at your scar, checking its age, texture, and colour to make sure you're a good candidate.
Think of it like an artist prepping a canvas. They need to understand every little detail before they even think about mixing their paints. In the same way, your practitioner will create a custom blend of several pigment shades, testing tiny amounts against your skin to get the perfect match for your unique undertones. This painstaking attention to detail is the secret behind a truly natural-looking result.
The diagram below breaks down the key things we look for—age, colour, and texture—during this critical first step.
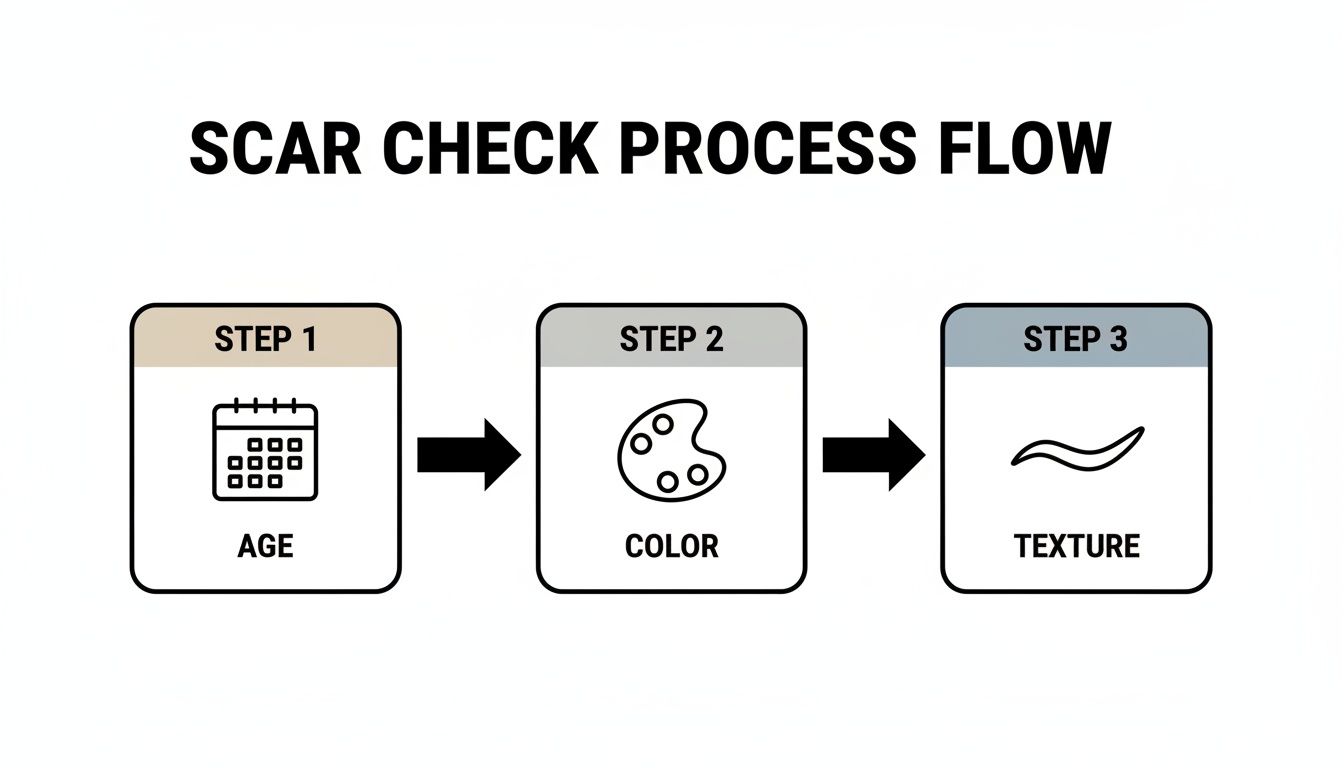
As you can see, the ideal scar is fully healed, lighter than the surrounding skin, and relatively flat.
The Treatment Session Explained
Once we’ve nailed your custom pigment colour, it's time for the treatment. We start by applying a topical numbing cream to the area to keep you comfortable from start to finish. Most clients say the feeling is like a light scratching or a mild vibration—nothing like a traditional tattoo.
Using a specialised digital tool, the practitioner gently deposits the pigment into the scar tissue. This isn't about colouring it in like a texta. It’s a delicate art, using advanced techniques like pointillism and soft shading to slowly build up the colour. The goal is a subtle, multi-dimensional effect that mimics real skin. How long it takes really depends on the size and complexity of your scar, but it can be anywhere from one to several hours.
Healing and What to Expect Next
Right after your session, the treated area will look a bit darker and might be slightly red or swollen. Don't worry, this is completely normal and a sign that the healing process has begun. Over the next 5 to 10 days, this initial intensity will fade quite a bit as your skin heals and the pigment settles into its true colour.
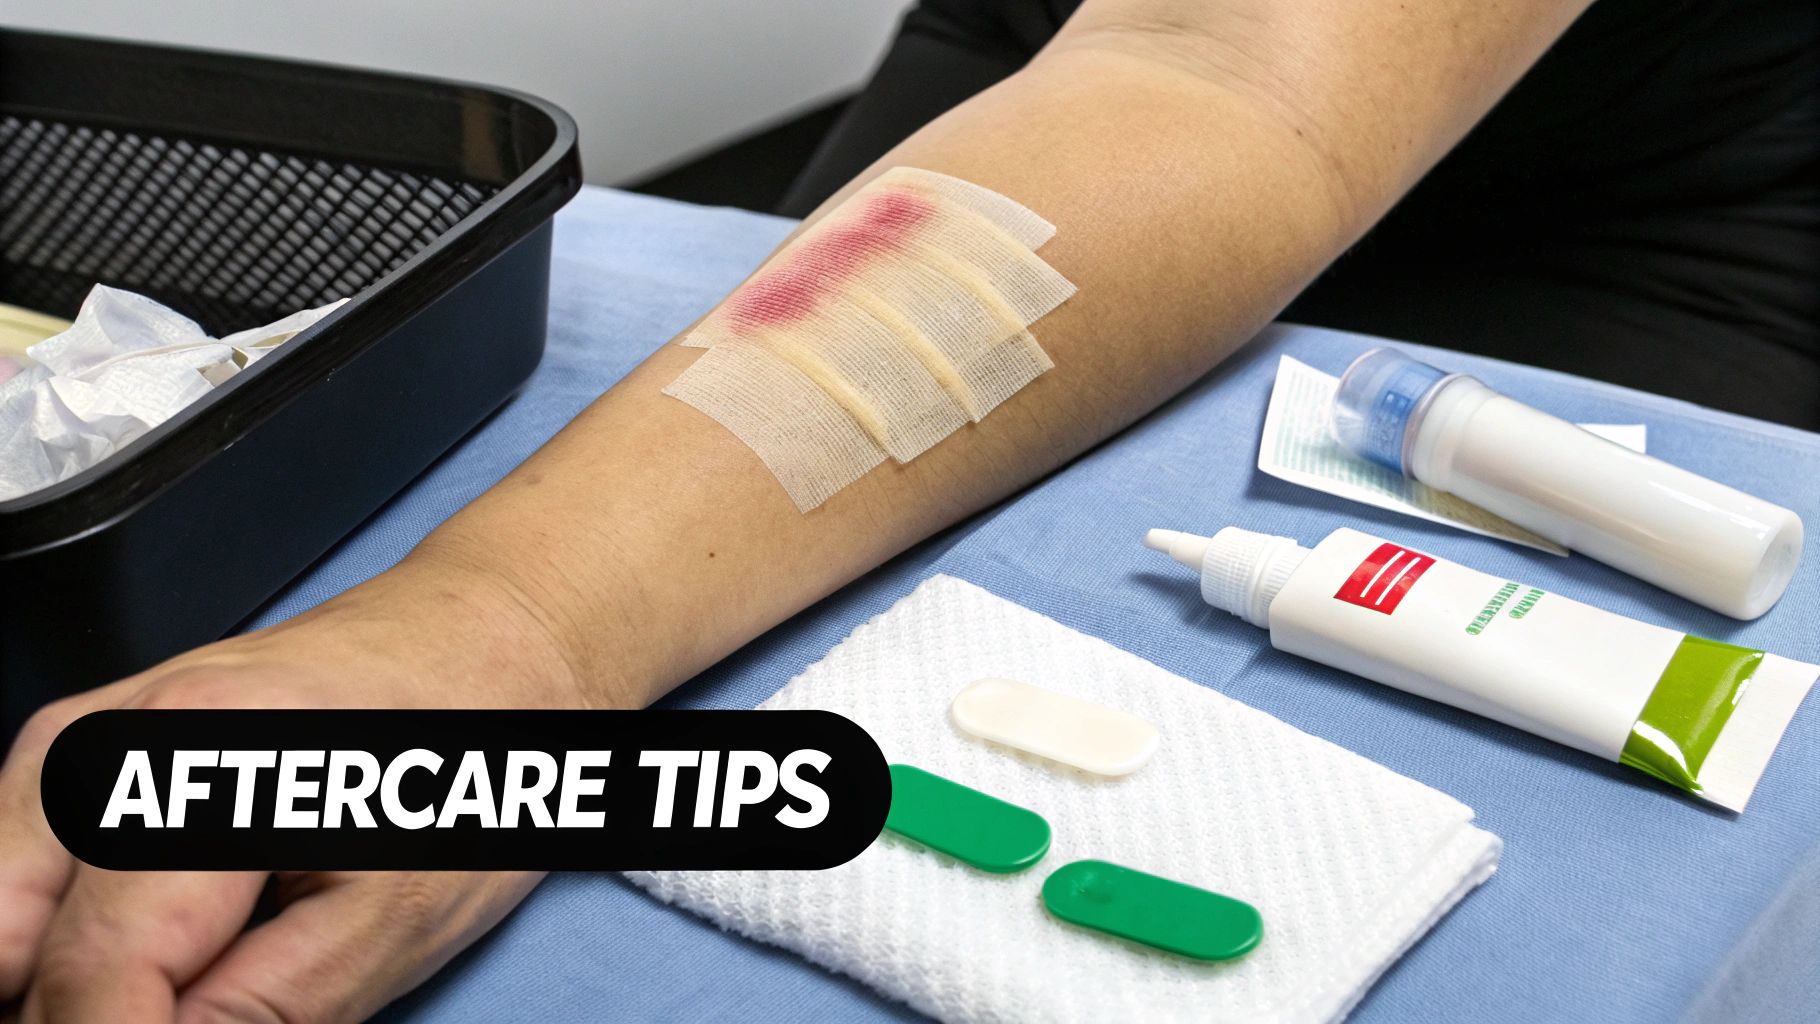
Following the aftercare instructions you’re given is absolutely essential. This usually means:
- Keeping the area clean and dry.
- Applying a special healing ointment we provide.
- Staying out of direct sun, pools, and avoiding heavy workouts that cause a lot of sweating.
Good aftercare protects your investment and helps the pigment heal perfectly, which is key for a beautiful, long-lasting result.
We often see the pigment settle by about 40% after that initial dark phase in the first five days. This is totally expected and it's exactly why we plan for more than one session.
Follow-Up Sessions for Perfect Blending
Scar camouflage is rarely a one-and-done deal. To get that seamless, "is it even there?" look, you'll likely need 2 to 3 sessions, sometimes more, spaced several weeks apart. This is all part of the plan. It gives us a chance to see how your skin has taken the pigment and where we need to make adjustments.
Each follow-up is an opportunity to fine-tune the colour, add a little more dimension, and perfect the blend until the scar just fades into the background. For instance, corrective work on white scars often requires this many sessions to really nail the result.
This layering method is what makes the final outcome look so subtle and realistic. If you're considering this for scalp scars, the step-by-step experience is very similar. You can get a feel for it by reading our detailed guide on the process of getting a hair tattoo.
Using SMP for Hair Transplant and Head Scars
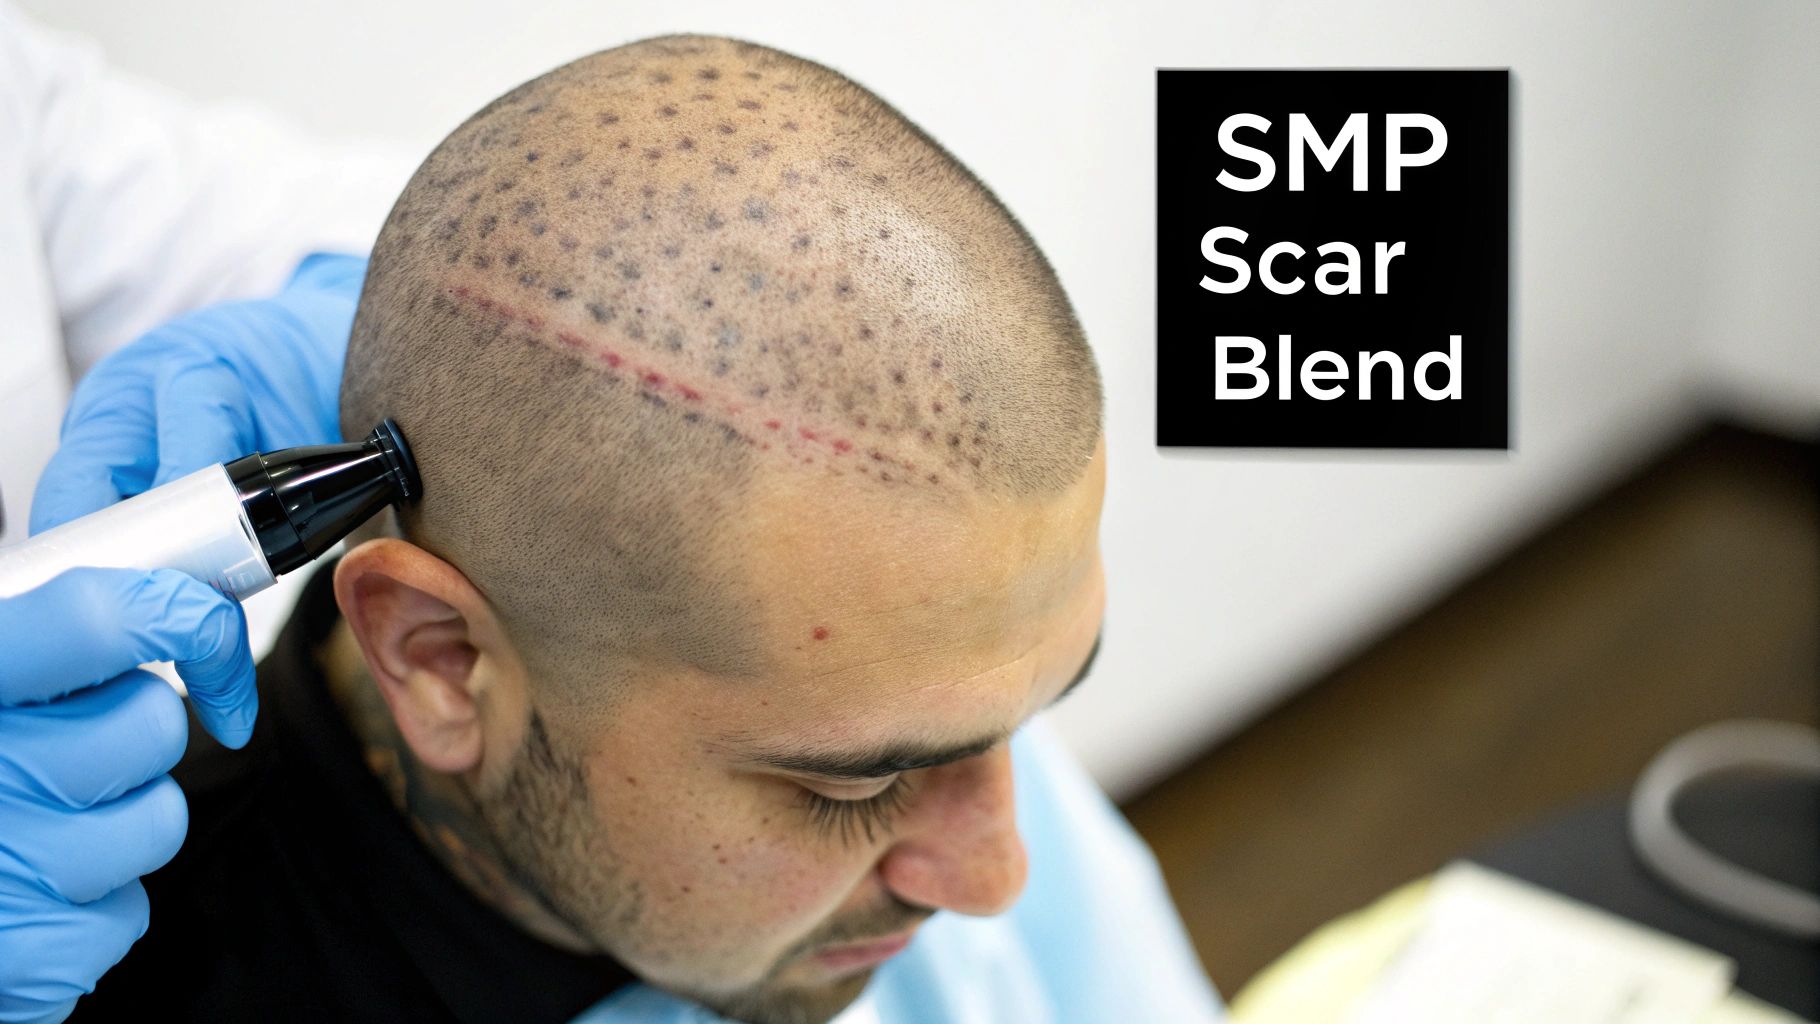
While you can often hide body scars under clothing, scars on the scalp are a different story altogether. They’re right out in the open, especially with shorter hairstyles or thinning hair, and can be a constant reminder of an old injury or surgery. This is precisely where Scalp Micropigmentation (SMP) comes in as a brilliant and highly effective fix.
SMP isn't your typical scar camouflage that just tries to match your skin tone. It’s a specialised scar tattoo camouflage technique developed purely for the scalp. Think of it as creating the illusion of thousands of tiny, individual hair follicles. A skilled practitioner uses custom-blended pigments and fine micro-needles to deposit these follicle impressions directly into the scalp and scar tissue.
The whole point is to make the scar disappear into the background. By carefully layering these tiny dots of pigment within the scar and the surrounding hair, the visual disruption is completely neutralised. The stark contrast between pale scar tissue and your hair simply vanishes, so the eye is no longer drawn to it.
Concealing Hair Transplant Scars
One of the most popular reasons people seek out SMP is to deal with the aftermath of hair transplant surgery. Both of the main methods, Follicular Unit Transplantation (FUT) and Follicular Unit Extraction (FUE), can leave behind noticeable marks.
-
FUT Scars: Known as the "strip method," this procedure often leaves a long, linear scar running across the back of the head. SMP is fantastic for hiding these, giving men the freedom to rock a short haircut again without a second thought.
-
FUE Scars: This technique results in lots of tiny, round scars dotted across the donor area. While they're smaller than a FUT scar, they can create a "moth-eaten" appearance. SMP works by filling in these small pale spots, bringing back a consistent, even look.
The process involves painstakingly placing pigment dots that perfectly mimic the colour and density of your natural hair follicles. This detailed approach seamlessly integrates the scar with the rest of your hair, giving you the confidence to wear any hairstyle you choose.
The real magic of SMP is that it delivers a one-two punch. It doesn't just camouflage the scar; it also creates the illusion of greater hair density across the entire area, giving you a fuller look overall.
This makes it a fantastic solution for both men and women who’ve had hair restoration surgery or experienced some form of head trauma. The final result is a natural-looking scalp where the scar seems to have faded away completely.
More Than Just a Cover-Up
The power of SMP scar camouflage goes well beyond just the physical fix. For many people, a visible scar on their head is a major source of self-consciousness, dictating how they cut their hair and affecting their confidence every single day. Taking back that control is a game-changer.
By making the scar practically invisible, SMP restores not just the appearance of a full head of hair but also your peace of mind. Clients tell us all the time how liberated they feel, no longer stressing about their scar being on show or having to be tactical with their hairstyling.
So, whether your hair is thinning, you love a sharp, shaved look, or you just want to forget the scar is even there, SMP offers a durable and incredibly realistic solution. It helps you close the chapter on your scar and step forward with fresh assurance. If you'd like to dive deeper, check out our guide on concealing scars with scalp tattoos.
Aftercare for Long-Lasting Results
The success of your scar tattoo camouflage doesn't end the moment you walk out the door. What you do in the following hours, days, and weeks is just as vital as the procedure itself. Think of it as protecting a valuable investment—your time, money, and newfound confidence are all on the line.
Proper aftercare is what allows the custom-blended pigments to settle and heal perfectly, giving you that seamless, natural result you came for. It’s also your best defence against complications like infection or poor pigment retention, which can seriously compromise the final look. Your artist's skill gets you most of the way there; your diligence is what gets you over the finish line.
Your Initial Healing Checklist
The first couple of weeks are the most critical. This is when your skin is at its most sensitive and the pigment is locking into place. Following a strict routine here isn't just a suggestion—it's essential for achieving a flawless blend. To support your body’s recovery, you can look into various strategies for quick healing.
Here’s a simple rundown of the dos and don'ts to give your treated scar the best possible start.
- Keep It Clean: Gently wash the area as instructed, usually with a mild, fragrance-free soap and water. Pat it dry very carefully with a clean paper towel—no rubbing!
- Apply Ointment: Use the aftercare balm we provide, but sparingly. A very thin layer is all it takes to keep the skin hydrated without suffocating it.
- Let It Breathe: Whenever possible, let the area get some fresh air. This really helps the natural healing process along.
- Don't Soak It: You'll need to avoid swimming pools, hot tubs, saunas, and long, steamy baths for at least two weeks. Submerging the area can introduce bacteria and draw the pigment right out of your skin.
- Avoid Heavy Sweating: Hold off on any strenuous exercise that makes you sweat heavily for the first week or so. The salt in your sweat can irritate the healing skin and interfere with how the pigment settles.
- No Picking or Scratching: As your skin heals, it might get a little itchy or flaky. Whatever you do, resist the urge to scratch or pick. This is one of the fastest ways to pull out the freshly implanted pigment and create patchy results.
Here’s a quick-glance table to help you keep track of the healing journey in those crucial first weeks.
Scar Camouflage Aftercare Timeline
| Timeframe | Key Aftercare Actions | What to Avoid |
|---|---|---|
| Days 1-3 | Gently clean the area 1-2 times daily. Apply a very thin layer of aftercare ointment. | Touching the area, direct water pressure, excessive sweating. |
| Days 4-7 | Continue gentle cleansing and ointment application. The area may feel dry or start to flake. | Scratching, picking at scabs, sun exposure, heavy workouts. |
| Week 2 | The skin surface should be mostly healed. Continue to keep clean and moisturised. | Soaking in water (baths, pools, spas), direct sunlight on the scar. |
| Week 3-4 | Flaking should be complete. You can usually resume normal activities like swimming and exercise. | Harsh skincare products (retinols, acids), still best to avoid prolonged sun exposure. |
This timeline is a general guide, but always follow the specific instructions given to you by your practitioner, as healing can vary slightly from person to person.
Long-Term Maintenance for Lasting Colour
Once your scar is fully healed, the game shifts to long-term preservation. The biggest enemy of any cosmetic pigment is the sun. Consistent, unprotected exposure to UV rays will cause those carefully matched colours to fade and break down over time.
The single most important habit for maintaining your scar camouflage is applying a high-SPF, broad-spectrum sunscreen every single day. This is the key to keeping your results looking fresh and vibrant for years.
Beyond sun protection, take a look at your skincare routine. Harsh products with ingredients like retinol, glycolic acid, or other strong exfoliants can speed up pigment fading if you use them directly over the camouflaged area.
While the results are long-lasting, they aren’t permanent. Most clients find they need a touch-up session every 2 to 5 years to refresh the colour and keep it looking its best. This is a completely normal part of the maintenance cycle.
The same principles apply if you've had scalp micropigmentation to hide a scar. For more specific details, check out our guide on scalp micropigmentation aftercare. By following these simple steps, you can protect your results and enjoy your confidence for years to come.
Choosing Your Specialist in Western Australia
Finding the right artist for your scar tattoo camouflage is easily the most critical decision you'll make in this entire process. This isn’t about finding a standard tattooist; you're looking for a highly skilled practitioner who truly understands the intricate science of skin, scar tissue, and pigment. Here in Western Australia, your choice will single-handedly dictate how natural and effective your final result will be.
Think of it like choosing a surgeon. You wouldn't just pick someone at random without checking their credentials, track record, and past results. The same level of care is needed here. A real pro has the steady hand of a clinician and the discerning eye of an artist, a combination that's essential for creating a blend that looks like it's part of you.
Look for a Specialist Portfolio
Before you even think about booking a consultation, your first move should be to dive deep into a practitioner's portfolio. You need to see clear, well-lit before-and-after photos of their actual scar camouflage work. This is the only real proof of their skill.
Keep an eye out for a variety of different scars and skin tones. A solid portfolio shows they're versatile and have a firm grasp of how to handle different types of scar tissue. To effectively choose a specialist, reviewing their previous work is crucial; you can for instance view their gallery to assess the quality and range of their cosmetic tattooing services.
Verify Specialised Training and Experience
Scar camouflage falls under a specific field known as paramedical tattooing. This is a discipline that demands specialised training that goes well beyond a standard cosmetic tattoo course. The practitioner you choose must have a deep understanding of skin anatomy, advanced colour theory, and the unique challenges that come with working on scar tissue.
Don't be shy—ask direct questions about their certifications and how many scar camouflage procedures they’ve actually performed. A seasoned artist will be open and proud of their qualifications, as they know it's the foundation of client trust.
This is absolutely not the time to hunt for a bargain or go with someone just starting out. You're investing in a procedure on a very sensitive area, and experience is simply non-negotiable.
The Consultation is Non-Negotiable
A detailed, in-person consultation is the bedrock of a great outcome. It's your chance to see their studio, feel out their expertise, and make sure you're completely comfortable putting your trust in them. During this meeting, a true professional will carefully assess your scar, manage your expectations, and explain what’s realistically achievable.
Here are the key questions you should have ready for your consultation:
- What type of pigments do you use? They should be using high-quality, medical-grade pigments made specifically for paramedical work.
- What are your hygiene and sterilisation practices? Look for single-use, disposable needles and a spotlessly clean environment. This is a must.
- Can you explain your process for colour matching? They should be able to walk you through a meticulous process of custom-blending colours to perfectly match your unique skin tone.
- How many sessions do you think I'll need? An experienced artist will give you a realistic estimate based on the specifics of your scar.
Choosing the right specialist in Western Australia means finding someone who is genuinely committed to safety, artistry, and your long-term happiness with the result. To learn more about how this procedure can benefit you, you might be interested in our deeper look at scar camouflage tattoo solutions.
Your Questions, Answered
It's completely normal to have questions before diving into something like scar tattoo camouflage. Feeling fully informed is the first step toward feeling confident in your decision. Let’s walk through some of the most common things people ask us here in WA.
Is Scar Camouflage Tattooing Painful?
Most clients are pleasantly surprised. The sensation is often described as a light, fast scratching or a slight vibration on the skin. We always apply a powerful topical numbing cream to the area before starting, which takes the edge off significantly. While certain areas might be a little more sensitive, it's far less intense than a standard tattoo.
What's the Cost for Scar Camouflage in Perth?
The cost really comes down to the unique nature of your scar – its size, complexity, and where it is on your body. A small, straightforward scar might start from a few hundred dollars for a session. The best way to think about it is an investment in your confidence. We'll give you a firm, personalised quote during your initial consultation once we've had a proper look and understand exactly what you need.
Does the Tattooed Area Tan With the Rest of My Skin?
This is a really important one to remember: the pigments we use are stable and won't change colour when exposed to the sun. This means if you get a tan, your natural skin will darken but the camouflaged area will stay the same colour, making it appear lighter by comparison.
Your new best friend is a high-SPF sunscreen, applied daily. This is non-negotiable for protecting the pigments from fading and keeping the colour blend looking seamless all year round.
How Many Treatments Will It Take?
Getting that perfect, barely-there finish is a process. It’s not a one-and-done deal. Most scars need between 2 to 4 sessions to layer the pigments correctly and achieve a truly natural blend. Working over multiple sessions allows us to see how the colour settles and make tiny adjustments, ensuring the final result is perfectly matched to your skin.
Ready to see how My Transformation can help you regain your confidence? Book your obligation-free consultation today and let's create a personalised plan to make your scar a thing of the past. Learn more at https://rightwing-health.info/a%3E.%3C/p%3E